Without staining, the view through the microscope reveals some basic structural detail of the tissue sections or smears, but most of the detail is not visible. This is especially true with very thin sections which lack contrast and can appear almost translucent.
Staining adds contrast as different components of the sample take on a different color and staining intensity, making structures within the tissue visible. The most common stain combination of choice is Hematoxylin and Eosin, H&E staining for short.
The principle of H&E staining
H&E staining is applied after the tissue has been fixed, dehydrated, embedded, sectioned, and the section has been mounted on a glass slide. Before staining, the embedding medium, typically paraffin wax, needs to be removed with solvents, typically Xylene. The section is then rehydrated by passing it through graded alcohol solutions decreasing in concentration and ending with water.
In the next step, the section is immersed in a Hematoxylin solution to stain cell nuclei. The intensity of the stain depends on the type of tissue, the thickness of the section, the duration of the immersion, to name but a few factors. Preferences of the pathologists who look at the slides also play a role. After a water-rinse, bluing changes the reddish stain of the Hematoxylin to blue.
Checking on intensity and background staining
A quick check with the microscope will tell lab technicians or pathologists whether the stain is sufficient or too strong. If staining is insufficient, they will repeat the immersion in Hematoxylin. If the stain is too intense and the section shows background staining, they will differentiate the section to reduce the staining with the help of an acidic solution. Bluing and rinsing in tap water is needed again after this step.
The next step is the Eosin stain. Eosin is a counterstain to Hematoxylin that enables differentiation of red blood cells, collagen, and smooth muscle with different hues of pink. Differentiation may also be needed for removal of excess Eosin, which can be achieved with water. The stained slides are then dehydrated by dipping them in graded alcohols and then Xylene. Once the staining and dehydration is completed, the sections are mounted using a drop of mounting medium and a coverslip.
When to check on staining
Protocols differ as to whether the check on staining and differentiation under the microscope is required after staining with Hematoxylin or after staining with Eosin. Checking after staining with Hematoxylin has the advantage of immediately being able to adjust, whether to re-immerse or repeat differentiation. Checking after staining with Eosin gives lab technicians or pathologists a better idea of the fully stained slide.
While both is possible, the quick check plays an important role in the lab workflow, because it makes sure that diagnosing pathologists can actually see the details they require.
Visible structures
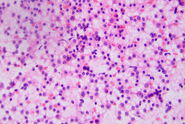
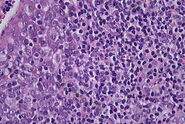
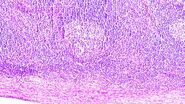
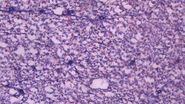
H&E-stained slides are observed using brightfield illumination. While Hematoxylin stains nuclei a blue purple color, Eosin stains the cell cytoplasm and connective tissue pinkish. Pathologists can easily differentiate between various tissue types, such as muscle or connective tissue, and perceive abnormalities or irregularities in sections due to the staining. This helps them to identify changes that could be responsible for specific pathologies, such as infection, chronic inflammation, or a malignant tumor. The visual information allows pathologists to observe structural changes within tissues enabling them to determine the nature and progress of diseases.
Color differentiation
Microscopes used in the staining workflow as well as for the diagnosis need to provide good color differentiation, as it is crucial for timely, accurate diagnoses. Checking of the staining is usually performed using a standalone microscope with a small footprint as the lab benches are typically crowded workspaces.
Microscopes used for diagnoses should be equipped with a good camera so subtle color variations are captured in images required for reporting and archiving. Annotation functionalities are helpful for report creation as well. If you’re interested in learning more about suitable clinical microscopes you might find the article “Factors to Consider when Selecting Clinical Microscopes” helpful.
Suggested reading
- P. Zorzi, C. Müller, Factors for Selecting Clinical Microscopes, Science Lab (2022) Leica Microsystems
- M. Barszczewski, P. Zorzi, P. Laskey, C. Müller, Clinical Microscopy: Considerations on Camera Selection, Science Lab (2022) Leica Microsystems
- C. Alwssandro, How to Benefit from Digital Cytopathology, Science Lab (2022) Leica Microsystems
- P. Zorzi, C. Müller, The Time to Diagnosis is Crucial in Clinical Pathology, Science Lab (2022) Leica Microsystems


