Introduction
Electron microscopes, including transmission and scanning electron microscopes (TEM and SEM), are extensively utilized to achieve high-resolution structural insights into biological specimens or inanimate materials. Ultramicrotomy is the predominant technique for obtaining ultrathin sections of less than 100 nm for TEM/SEM analysis. During room temperature sample preparation, small sample pieces are embedded in epoxy or acrylic resin. Excess resin is then removed through trimming, and the specimen is sectioned into ultrathin slices (50 nm - 100 nm) using either a glass or diamond knife.
The trimming process is crucial for eliminating excess resin that does not contain the sample, exposing the specimen, and creating a block face that includes the regions or cells of interest for subsequent sectioning. In current standard workflows, the actual target region cannot always be directly identified on the ultramicrotome using the standard stereo microscope. Instead, exemplary (semithin) sections are stained, for example with toluidine blue and transferred to an external light microscope to determine if the target plane of the specimen has been reached. Subsequently, tedious adjustments on the ultramicrotome are necessary to ensure precise ongoing sectioning without sample loss.
To avoid these risky and labor-intensive transfers and readjustments, a method for a safe and automatic approach to the target plane would be highly valued by the electron microscopy community. This would also enable inexperienced users to safely and efficiently approach the plane of interest.
Challenges
To develop such a method three challenges appear. The first is to visualize the target structure within the resin. Secondly, the position of the target trimming plane must be defined with all its parameters like depth, pitch and yaw in relation to a reference plane. Thirdly, an ultramicrotome must enable the visual selection and then in turn approach the target automatically with all the parameters set.
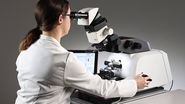
In this article we show how these challenges are resolved with a workflow including the automated ultramicrotome UC Enuity.
To prove the concept with a biological sample the idea was to target a well-known structure in the nematode C. elegans, namely a zone behind the pharynx at the junction between pharynx and intestine, the so-called pharyngeal-intestinal valve (VPI, Figure 1).
C. elegans prepared by high pressure freezing followed by freeze substitution with light contrasting by osmium tetroxide and embedding in Epon epoxy resin.

Visualization of the target
One non-destructive technique to visualize a structure inside a resin is using X-ray computed-tomography (CT). For small samples like electron microscopy specimens a smaller variant is used micro-CT. For micro-CT the sample is mounted onto a rotatable post and exposed to X-rays while being turned in specific angles. The specimen absorbs and scatters the rays and the beam emerging from the sample is recorded by a detector, e.g. an sCMOS camera. The resulting turn-series of images is rendered into an 3D image, which can be used to visualize an invisible structure within the resin just by the subtle differences in density and composition.
Here, the C. elegans specimen was visible by eye within the resin block as it was fixed and contrasted with osmium tetroxide before embedding (Figure 2). Nevertheless, a precise targeting in 3D by using the stereomicroscope mounted to the ultramicrotome alone was not possible without the tedious approach creating semithin sections. Furthermore, it is very difficult to manually achieve a a perfect cross section of the target plane, as the worm is bend and not perpendicular to the pretrimmed surface.

Hence, the sample was recorded using a micro-CT device (Bruker, Skyscan 1270 MicroCT) to reveal the specimen outline (Figure 3). The idea was to target the terminal bulb of the nematode to be as close as possible to the transition zone between pharynx and intestine.
Pretrimming
Before any precise sectioning step the sample needs to be trimmed to obtain a shape of the embedding material surrounding the specimen increasing stability during sectioning and to remove excessive unnecessary resin to get good micro-CT images. Typically this is done manually with a razor blade under visual control with a stereo microscope. On average the resulting shape around the specimen is pyramidal with the tip removed like a mesa (Figure 2). For the targeting using the micro-CT this mesa is particularly important, as it is used as a reference plane to align the outline of the sample in the real world with the sample and the final target plane visualized in the software.
Definition of the reference and target planes
To define the reference and the target plane it is crucial to not only picture the sample, but also to selectively show the surrounding resin. This allows to relate the target plane selected in the 3D data set on the screen of the ultramicrotome with the actual “real-world” specimen mounted to it (Figure 3). Leica Microsystems’ UC Enuity allows to load micro-CT data in different formats (e.g. DICOM, XRM, TIFF, JPEG and others).

The reference plane is defined by interactively moving 3 points in the image to the front of the sample, the mentioned mesa plane. With the help of the 3D viewer and the cross section display beside, it is easy to create the reference plane (Figure 4).

After definition of the reference top surface, the actual target plane is configured (Figure 5). Indicated by the green plane, the pitch and yaw of the target plane can be defined in the 3D viewer on the left.

The righthand display shows the section through the cut plane to ease the finding of the structure of interest. For reaching the end of the pharynx we tried to hit the end of the posterior bulb in order to be sure not to lose the pharyngeal-intestinal valve. To do so, we adjusted the cutting plane to be within the posterior bulb being visible by a holy structure in the xy-display (Figure 5).
Automatic trimming
By approving the settings with clicking “Adjust” the UC Enuity automatically configures knife angle, sample tilt and sample rotation (Figure 6). Afterwards the trimming speed and trim section thickness can be defined and the process being started. The fully automated trimming gives time back to the user to prepare next steps or to do something else.

Result
Following the automatic trimming an image of the sample was taken and an overlay with an image of the “Cut Plane” window was created (Figure 7). The side-by-side image gives an impression on the success of the automatic approach. Typically, an accuracy of less than 10 µm can be achieved.

Subsequent to the automatic target plane trimming the first sections of the block face were sectioned and collected on an EM grid. After staining with uranyl acetate and lead citrate the first section was imaged on the transmission electron microscopy. The transition zone between pharynx and intestines are visible proving, that the angles and the trim depth was accurately applied with the automatic approach using the UC Enuity.
Summary
In this article we learned, that 3D micro-CT data can be used on the UC Enuity to accurately target a specific plane-of-interest in a resin block. The micro-CT data can be loaded into UC Enuity´s software and the target plane can be interactively determined. The instrument takes care of adjusting knife and sample parameters. This helps to reduce tedious, iterative checks of semithin sections during the trimming in depth, allows to cut the sample in specific angles easily and frees up time for the user to do other tasks.

Acknowledgements
The author likes to thank Yannick Schwab and his whole team (EMBL, Heidelberg, Germany), particularly Kimberly Meecham for the collaboration and technology transfer that allowed the implementation of the “Crosshair” workflow as 3D Trim module into UC Enuity.
A special thank you also to Felix Gaedke, PhD (CECAD Cologne, Germany) for creating the samples and providing knowledge in many ways.
C. elegans kindly provided by Prof. Thorsten Hoppe, Inst. for Genetics, Cologne, Germany.